FOR SALES & SUPPORT +961 1 451245
 +961 71 333850
HAVE AN INQUIRY? EMAIL US: INFO@SATERMED.COM

Menu
Categories

Product Information
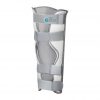
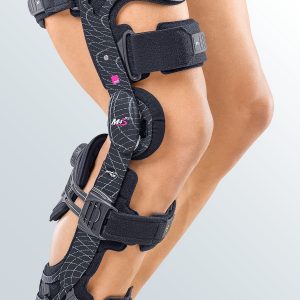
The protect.4 evo is a functional knee orthosis.
The product is exclusively to be used for the orthotic fitting of the knee and only on intact skin.
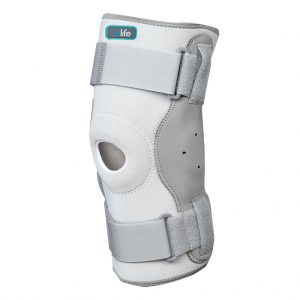
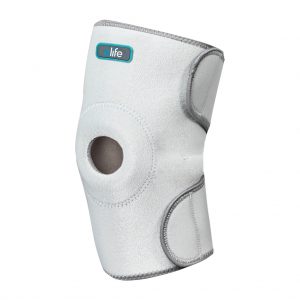
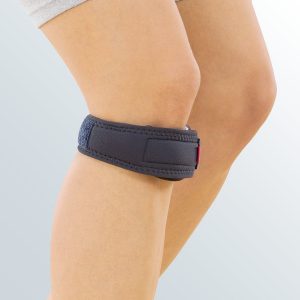
Category: Knee
Product benefits
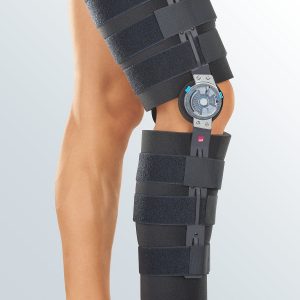
- Polycentric hinges
- Flexible buckles made of plastic
- The buckles are flexible on the ends. This ensures an excellent grip.
- Numbered straps ensure a simple and correct fastening
How does it work?/Mode of action
Functional rigid brace with limitation of flexion / extension:
extension limitation at: 0°, 10°, 20°, 30°, 45°
flexion limitation at: 0°, 10°, 20°, 30°, 45°, 60°, 75°, 90°
immobilisation at: 0°, 10°, 20°, 30°, 45°
Optimal stabilisation due to 4-point principle
Limitation of anterior and posterior tibial glide
Stabilisation of the collateral ligament
Prevention of hyperextension through limitation of
Range of motion
Reduction of medial rotation
Donning/fitting instructions
Open all the straps. Sit on the edge of a chair, pull the brace up the affected leg and flex your knee to 45°. Position the joints so that the centres of the hinges (extension wedges) are on a level with the top edge of the kneecap. Make sure that the brace is not twisted on your leg.
First fasten the lower front calf strap, then the upper back thigh strap. Keep your knee in a flexed position and push both joints towards the back of the leg.
Now fasten the lower back thigh strap. Make sure that you do not have the hinge joints positioned in front of the midline of the leg.
Now fasten the upper front calf strap. Then the upper back calf strap, and finally the front thigh strap.
Bend your knee slightly a few times and refasten the straps again in the order described above to prevent the brace slipping.
Setting the flexion / extension limits
Extension limit wedge, silver: 0°, 10°, 20°, 30°, 45°
Flexion limit wedge, black: 0°, 10°, 20°, 30°, 45°, 60°, 75°, 90°
Can be immobilised at: 0°, 10°, 20°, 30°, 45°
For immobilising the orthosis first insert the flexion wedge and then the corresponding extension wedge. The medial (inside) and the lateral (outside) wedge settings must always be the same.
10° extension and 90° flexion wedges are pre-installed in your knee brace as standard (In the UK only 10° extension wedges fitted, remainder included as spare parts).
To replace the wedges first loosen the screws in the joint cover, then take the cover off, the wedges can now be removed by being gently pulled out in a forwards direction.
To change the silver extension wedge loosen the screw and pull the wedge out from the front of the joint. You will find the replacement wedge in the wedge set. It is marked with the corresponding wedge setting. Slide the new extension wedge into the front of the joint. Now replace the screw in the threaded hole and screw it tight.
The flexion wedges are installed from the back of the joint. Select the suitable wedge from the wedge set. Insert the wedge and secure it with the appropriate screw (enclosed).
Bend and flex the brace ‘joint’ a couple of times and check that the wedges are positioned correctly. Finally, secure the joint cover.
Be the first to review “4-point knee orthosis for control of anterior and posterior tibial translation” Cancel reply

Related products

Quick View

Quick View
Quick View
Quick View
Quick View
Quick View
Quick View
Quick View
Quick View
Quick View
Sater International – Carelax Company seeks to provide quality health care products and excellent service that help patients to ease their pain and gain high quality medical equipment and products through reasonable prices.
Contact Details
The Middle East & Africa Representative
Head office: Sater International – Carelax, Airport Rd,
Bella-Casa Bldg,2nd floor, Beirut, Lebanon
Main branch: Sater International – Carelax, Airport Rd, Bella-Casa Bldg, ground floor Beirut, Lebanon
Tel/Fax: +961 1 451245 | +961 1 451845
Hamra branch: Hamra Clemenseau Street,
near CMC Hospital,
Beirut, Lebanon
Tel/Fax: +961 1 371850
Reviews
There are no reviews yet.